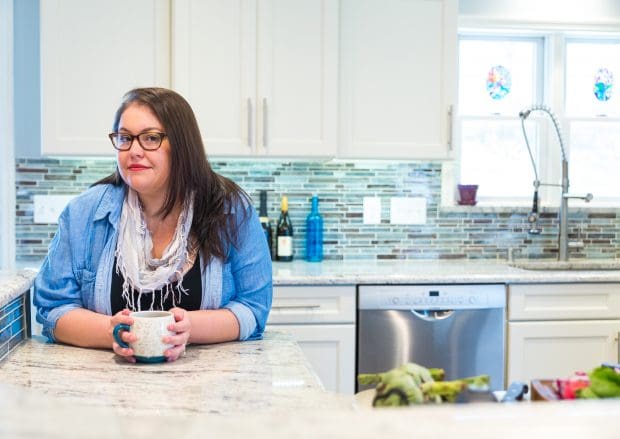
November 24, 2009

Pumpkin Cookies with Brown Butter Icing & Award

These cookies will be making a grand appearance at this years Thanksgiving dessert spread.  Do you want to know how delicious they are? Amazingly delicious that is how much!  They have a soft moist cake like texture and are topped with the most delicious brown butter icing. I know I’m back to talking about brown butter.  I can’t help it. It’s so amazing.  The best part about this icing is that you are guaranteed to get the nutty brown butter flavor in each and every bite….yum!  Enjoy!!!

Pumpkin Cookies with Brown Butter Icing:

Cookies:
2 3/4 C. all-purpose flour
1 t. baking powder
1 t. baking soda
1 1/4 t. coarse salt
1 1/2 t. ground cinnamon
1 1/4 t. ground ginger
3/4 t. ground nutmeg
1 1/2 sticks unsalted butter – softened
2 1/4 C. light-brown sugar – packed
2 large eggs
1 1/2 C. canned solid-pack pumpkin (14 ounces)
3/4 C. evaporated milk
1 t. pure vanilla extract

Icing:
4 C. confectioners’ sugar – sifted
10 T. unsalted butter
1/4 C. plus 1 T. evaporated milk
2 t. pure vanilla extract

Make cookies: Preheat the oven to 375 degrees. Whisk together flour, baking powder, baking soda, salt, cinnamon, ginger, and nutmeg in a medium bowl; set aside.

Put butter and brown sugar in the bowl of an electric mixer fitted with the paddle attachment. Mix on medium speed until pale and fluffy, about 3 minutes. Mix in eggs. Reduce speed to low. Add pumpkin, evaporated milk, and vanilla; mix until well blended, about 2 minutes. Add flour mixture; mix until combined.

Transfer 1 1/2 cups batter to a pastry bag fitted with a 1/2-inch plain tip (such as Ateco #806). Pipe 1 1/2-inch rounds onto parchment-lined baking sheets, spacing 1 inch apart. Bake cookies, rotating sheets halfway through, until tops spring back, about 12 minutes. Cool on sheets on wire racks 5 minutes. Transfer cookies to wire racks; let cool completely.

Make icing: Put confectioners’ sugar in a large bowl; set aside. Melt butter in a small saucepan over medium heat. Cook, swirling pan occasionally, until golden brown, about 3 minutes. Immediately add butter to confectioners’ sugar, scraping any browned bits from sides and bottom of pan. Add evaporated milk and vanilla; stir until smooth. Spread about 1 teaspoon icing onto each cookie. If icing stiffens, stir in more evaporated milk, a little at a time. Cookies can be stored in single layers in airtight containers at room temperature up to 3 days.

Source: Martha Stewart

Now onto the award. Liz of the wonderful blog Hoosier Homemade gave me an award for being a friendly blogger. Thanks

Since I was given this award I have to follow a few rules. The big one is that I need to answer the question “Why do I love to Blog?” Wanna know my answer? Ok I guess I will share that with you all :)

I started blogging in February 2009 and have enjoyed it more than I thought I would. I know that probably sounds weird, but if you knew me in the “real” world you would know I start a lot of stuff that I lose interest in. However blogging has not been one of these things. I don’t have a great epiphany moment where I decided I wanted to blog. In fact mine was so much less than that. I happened to be searching for a recipe and stumbled upon Culinary Concoctions by Peabody. I read over her blog and immediately realized how fun it would be to have a blog. I thought “I can be witty like her….people will love me!” While I may not be as witty as Peabody I certainly feel as though I must have something to offer the food blogging world because I seem to a small group of loyal commentators and followers. When I get a comment on my blog you have no idea how happy it makes me. They are like little bursts of happiness in my day :) That is probably another reason I like blogging. It makes me feel good. I’m happy that I can make something in my small New York kitchen and share it with everyone all over the world. The last thing I love about blogging is “meeting” a whole new group of people who share the same obsession with food as I do :) I have made a lot of great friends through blogging and I can’t wait to see what the years bring me and my blog…. :)

I’m going to pass this award on to a few other bloggers who stick out in my head for various reasons.

Reeni of Cinnamon Spice and Everything Nice (She was the very first person to comment on my blog that I didn’t know in real life :) You have no idea how exciting that was…haha)

Faith of Thought 4 Food (Since working on All Through the Year Cheer with her we have become great friends…and she is really nice too :) )

Miranda of A Duck in her Pond (She is so friendly and sweet. Plus she let my Kitten Bitten have a playdate with Booger the Lobster :) )

Jen of My Kitchen Addiction (I was fairly new to blogging and she put one of my recipes on her Friday Favorites. I was shocked when I saw that she actually liked one of my recipes and wanted to share it with her readers. Just for the record every time I’m featured on your Friday Favorites I get giddy :) )

And the Rules:

Neno’s Award—-Rules and Regulations

1. As a dedication for those who love blogging and love to encourage friendships through blogging.

2. To seek the reasons why we all love blogging.

3. Put the award in one post as soon as you receive it.

4. Don’t forget to mention the person who gives you the award.

5. Answer the award’s question by writing the reason why you love blogging.

6. Tag and distribute the award to as many people as you like.

7. Don’t forget to notify the award receivers and put their links in your post.

Ok sorry for the rambling. It’s late here in New York and sleepiness is slowly overtaking my body. I just watched some Victoria Principal infomercial and now it’s the Magic Bullet infomercial! Hooray….sadly I love this infomercial :) Hopefully I can fall asleep instead of watching all the fantastic acting………………..

November 21, 2009

Thanksgiving Round-Up for All Through the Year Cheer!!!


Hey everyone! Make sure to head on over to All Through the Year Cheer to submit your Thanksgiving themed recipe. Remember this recipe can be ANYTHING that means or reminds you of Thanksgiving. The winner of the event will be announced on Monday. Oh do you want to know what the winner gets? Well head on over to see…. :)

November 20, 2009

Cranberry Nut Bread


I realize that you may be thinking to yourself “wait…I thought she hated nuts???” Well you are right I still dislike most nuts BUT I don’t mind almonds. So that means officially I can and will eat:
Almonds
Pecans (as long as it’s not a pecan pie….I don’t think I could handle that)

So since this recipe originally called for pecans or walnuts I had to switch things around. Since there was a bag of sliced almonds in the freezer I threw in a couple handfuls of them to give the bread the little crunch it needed. I also opted to use fresh cranberries instead of dried. I think the fresh added a tartness that I personally found super delicious. How can you hate sweet and tart? I know I don’t! My favorite way to eat this bread is toasted with butter although it’s fantastic plain. You want to know another great thing about this bread? It freezes perfectly. That is important to me. Sometimes baked goods overflow out of my kitchen and it’s important for me to freeze them before they go to waste. My plan is to make a bunch of these little loaves, package them up and give them to family members along with the limoncello I made. Editable gifts are the best :) Enjoy!!!

Remember tomorrow on the All Through the Year Cheer page I will be putting up the MckLinky and asking for submissions for the Thanksgiving event. Also remember there will be a prize!!! :)

Cranberry Nut Bread:

2 C.  flour
1 t. salt
1 C. + 2 T. sugar
1/2 t. baking soda
1 egg
1/3 C. OJ
1/4 C. water
2 T. melted butter
2 C. cranberries – cut in half
3 oz chopped nuts

Combine flour, sugar, salt, soda and set aside. Combine egg, OJ, water and butter and stir into dry ingredients until only moistened. Stir in berries and nuts. Bake in greased loaf pan at 350 x 60-70 minutes. This recipe will also make 2-3 mini loaves (depending on pan size) and should be baked 35 to 40 minutes.

November 17, 2009

Maple Pecan Shortbread – Kooky Cooky Challenge

I have only recently started to like the flavor of pecans.  I know it’s weird but I just have never been a fan of nuts.  To this day I still dislike walnuts…yuck!  Luckily since I now enjoy pecans I enjoyed these delicious cookies.  They had a hint of maple flavor and the perfect cookie crunch.  I froze a little bag of these cookies and they froze beautifully.  My plan is  to make them again and freeze them for my Christmas cookie trays.

The only thing I changed about this recipe was leaving out the maple flavoring. I did not have any in the house and was not about to run out and try and find some. I used a little more maple syrup instead and made sure to use Grade B.  It has more maple flavor than Grade A…in my opinion :) Enjoy!

Maple Pecan Sandies:

2 1/4 C. all purpose flour
1/2 C. cake flour (not self-rising)
1/2 t. salt
1/2 C. pecan halves – finally chopped
24 whole pecan halves
2 sticks unslated butter – room temperature
3/4 C. granulated sugar
1/4 C. maple sugar – Grade B
1 large egg yolk
1/4 t. pure maple extract
1 large egg – light beaten
Turbinado sugar – for sprinkling

Into a medium bowl, sift flours and salt. Whisk in 1/2 cup chopped pecans, set aside.

In the bowl of an electric mixer fitted with the paddle attachment, cream butter and granulated sugar on medium-high speed until smooth and light, about one minute. Add the maple syrup, egg yolk, and extract; beat on medium speed until well combined. On low speed, gradually add flour mixture, beating until just combined. Dough should be smooth and pliable. Flatten into a disk. Wrap in plastic; chill until firm, 1 1/2 hours or overnight.

Preheat oven to 350 degrees. Line baking sheet with parchment paper.

On a lightly floured work surface, roll out dough to 1/4 inch thick. Cut out rounds using a two-inch cookie cutter; place one inch apart on prepared baking sheet. Brush tops with beaten egg; sprinkle centers with remaining 1/4 cup pecans. Sprinkle the entire surface with turbinado sugar.

Bake cookies, rotating baking sheet halfway through, until golden around the edges, 10 to 12 minutes. Transfer to a wire rack to cool. Store in airtight containers at room temperature up to four days.

Source: Martha Stewart

Add to FacebookAdd to DiggAdd to Del.icio.usAdd to StumbleuponAdd to RedditAdd to BlinklistAdd to TwitterAdd to TechnoratiAdd to Yahoo BuzzAdd to Newsvine

November 15, 2009

Pear Crisp with Vanilla Brown Butter

All Through The Year Cheer Fall
Do you love pears? Do you love vanilla? Do you love brown butter? If you answered yes to these questions then head on over to All Through the Year Cheer to check out the full recipe. Enjoy!

IMG_1556

November 12, 2009

Skillet Cinnamon Apples

IMG_2147 (Medium)

Looking for a quick dessert? Look no further! It has been found! I was wandering around my kitchen the other day and wanted something sweet but didn’t want to put a lot of time into the preparation. I saw my cast iron skillet and then a bowl full of apples. Wah Lah! An idea. How about making a quick apple dessert in my pan. I put some butter in my pan and popped it into the oven to melt. While that was working I started peeling and cutting my apples. I would recommend cutting your slices thick instead of thin. I found the thinner slices to shrink a lot. Arrange the apples on top of the butter, sprinkle with oats, brown sugar, cinnamon and nutmeg. Throw in the oven and cook for about 20 to 30 minutes. You’re looking for your apples to be soft but not mushy. Pull the apples out of the oven, let cool for a few minutes and then serve. Or you can do what I did….eat it right out of the pan :) The apples are soft, sweet and full of cinnamon flavor. The brown sugar creates a delicious syrup and in some places creates an almost caramel like texture. The next night I warmed up the apples in the microwave and put a few scoops of brown sugar ice cream on top…..heaven :) Enjoy!!!

IMG_2135 (Medium)

Apples waiting to get topped.

Skillet Cinnamon Apples:

3 T. butter
2 – 3 apples – peeled and quartered
1/4 C. quick cooking oats
1/2 C. light or dark brown sugar
Sprinkle of cinnamon on top
Light zest of fresh nutmeg on top

Preheat oven 350 degrees
Melt butter in cast iron skillet and lay apple slices in one layer on bottom of pan. Sprinkle oats, brown sugar and spices on top of apples. Cook for 20 to 30 minutes until apples are soft.

November 9, 2009

Maple Sugar Ragamuffins & Giveaway Winner!

Touchup

I’m going to be honest with you. I always knew a Ragamuffin was a cat breed. I also knew when I was in high school and showed up with what some would describe as “pajama like” clothing my friends would tell me I look like a ragamuffin BUT never did I expect to see this word in the name of a recipe. So when I did I knew I had to make them. How could I miss an opportunity to make something that not only sounded great but had such a fun name!

The texture of the ragamuffins is more of a biscuit than a traditional cinnamon bun. It is VERY sweet so while I was going to make a maple glaze for the top it did not need it at all! It is sweet and mapley (is that even a word?) enough with out it :) I found maple sugar at my grocery store but found it to be quite expensive. It was anywhere from $6.99 to $9.99 for 6 ounces of the stuff. So I did what any normal human being does. I looked on Amazon and lo and behold they had some! Free shipping and all:) Now I’m not sure what I’m going to do with all this maple sugar but I did find a lot of great recipes on epicurious that included this sweet maple treat so I will be sure to give them a try!

What was it like to make them? Easy.  I’m a big fan of easy.  We have been friends for a LONG time.  My favorite part about our friendship is that we never get mad at each other :)   The most complicated part of this recipe is the tight rolling of the dough.  I obviously did not get it tight enough, because as you will notice in the pictures, the ends started to fall flat against the pan. Oh well.   It still tasted great so in the end I guess that is all that matter :)

IMG_2381 (Medium)

Now does everyone want to know who won????? I used random.org to pick a winner and the lucky winner was number 6….that means girlichef won! Just send me an email with your address and I will pass it along to the great people at My Blog Spark. Congratulations!!! :)

Maple Sugar Ragamuffins:

For dough
2 C. all-purpose flour
1 T. granulated maple sugar
1 T. baking powder
1/2 t. salt
5 tablespoons cold unsalted butter – cut into small pieces
3/4 C. whole milk

For filling
3/4 stick (6 tablespoons) unsalted butter – well softened
1 cup granulated maple sugar (6 ounces)

Make dough:
Put oven rack in middle position and preheat oven to 400°F. Line a large (17- by 14-inch) baking sheet with parchment.

Whisk together flour, maple sugar, baking powder, and salt in a large bowl. Blend in butter with a pastry blender or your fingertips until most of mixture resembles coarse meal with some small (roughly pea-size) butter lumps. Add milk and stir with a fork until a shaggy dough forms. Gently knead dough 8 to 10 times with floured hands on a lightly floured surface.

Roll out and fill dough:
Roll out dough on a lightly floured surface with a floured rolling pin into a 13- by 11-inch rectangle. Spread softened butter evenly over dough and sprinkle all over with maple sugar, pressing firmly to help adhere. Beginning with one long side, roll up dough snugly, jelly-roll style. Cut roll crosswise into 12 slices with a sharp knife. Arrange slices, cut sides down, 2 inches apart on baking sheet. Gather any maple sugar from work surface and sprinkle on top of rolls. Bake until rolls are puffed and golden, 18 to 20 minutes. Transfer to a rack to cool until warm, about 15 minutes.

Source: Gourmet from Epicurious

MSRagamuffin

In case you were wondering this is not a Maple Sugar Ragamuffin. Also take note of my fine photoshop skills :)


Add to: Facebook | Digg | Del.icio.us | Stumbleupon | Reddit | Blinklist | Twitter | Technorati | Yahoo Buzz | Newsvine

November 6, 2009

POM Iced Coffee Review and a GIVEAWAY!!!

I was recently contacted by the kind people at POM to try some of their new iced coffee. Before you start thinking it’s pomegranate flavored it’s not…that would be a bit gross. It actually contains 100% natural blend of polyphenol antioxidants which is equivalent to drinking an 8oz. glass of pomegranate juice. How awesome is that! I guess that is why they call it a “healthy buzz.” Yum yum!
POM Iced Coffee

Wanna know something else that is great about POM iced coffee? It works in collaboration with the Rainforest Alliance. What does this mean? It means that POM Wonderful makes sure their coffee meets rigorous standards that conserve biodiversity and provide sustainable livelihoods. Rainforest Alliance Certified farms benefit from improved efficiency, reduced costs and better management practices while workers benefit from a cleaner, safer, more dignified workplace where their rights are respected. Another great thing about POM Iced Coffee. They only used shade grown beans, hormone free milk and organic cane sugar.

My thoughts about the coffee…it’s good. My favorite flavor was coffee au lait, then vanilla and last chocolate. I found them to be delicious coffee treat that I could easily grab on my way out of the door. Both the vanilla and chocolate flavor are fat free and the coffee au lait has only 3 grams of fat. Not to bad. Much better than the fat count in the iced coffee from those other coffee places…… :) I say if you see it in the store grab one! It really is tasty and if you are going to be drinking coffee that day anyway…why not try it?

fiber_one

Now onto my GIVEAWAY!!! Hooray for free stuff :) I was asked by the kind people at MyBlogSpark and Fiber One to try some of their Fiber One Toaster Pastries in Brown Sugar Cinnamon Flavor. My opinion? Delicious! My favorite part is that it’s full of fiber which is always a good thing. Twenty percent of your daily value of fiber (5 grams) to be exact. I was also given a great little “morning on the go” pack that consisted of a lunch bag, travel coffee/beverage mug and planner. The fun doesn’t stop there either….I get to give one of these awesome packs away to one of my lovely readers! How much fun is that :) The giveaway starts as soon as you read this, ends Monday November 9th 2009 5pm EST and a winner will be announced after 5pm EST Monday night. There are up to six ways to enter this giveaway.

IMG_2212 (Medium)

Please leave a separate comment for each entry (Please leave an email address so I contact you if you win :) )

- Comment on my blog answering the question: What is your favorite Fiber One product? or What is your favorite way to get more fiber in your diet?

- Stumble this giveaway

- Tweet this giveaway and leave me a comment with your twitter name

- Friend Nutmeg Nanny on Facebook or if you are already my friend leave a comment letting me know

- Follow Nutmeg Nanny on Twitter or if you are already following me leave a comment letting me know

- Talk about this giveaway on your blog

This giveaway is only for U.S. residents – sorry international readers.

Good luck to all who enter :)

Source: POM Wonderful

November 4, 2009

Honeycrisp Apple Sangria

IMG_2103 (Medium)

I have often associated sangria with summer. There is just something about that fruity sweet wine mixed with delicious liquor soaked fruit and screams outside summer party.  As I stared at a bowl full of honeycrisp apples I knew I had to do something with them before they went to waste.   I searched online and found a lovely Fall inspired sangria.  It mixes deep fragrant flavors of cinnamon, ginger and cloves with light crisp citrus flavors.  It would be perfect for a party or even to enjoy alone :)   My favorite part of the sangria was munching on the apples that were left over. Amazing!  The great thing about using honeycrisp apples is that they are crisp (the name really does fit the product), hold up great to soaking and still keep some of their natural sweetness.  If you are planning a party I seriously recommend making this.  I used one of my favorite unoaked chardonnays, Wishing Tree, but use whatever unoaked you prefer.  In all honesty I cannot stand chardonnay unless it’s unoaked…there is just something about the buttery flavor of oaked chardonnay that I do not appreciate.  I also find unoaked a bit more refreshing and crisp on the tongue.  Enjoy!

bottleglass

Honeycrisp Apple Sangria:

2 Honeycrisp apples
One 750-milliliter bottle unoaked Chardonnay
1/3 C. peach Schnapps
1/4 C. pisco (I could not find this so I used a bit more peach schnapps)
1/4 C. honey (I used orange blossom)
2 oranges- 1 quartered
1 lemon – quartered
1 lime – quartered
2 cinnamon sticks
2 quarter-size slices of fresh ginger
3 whole cloves
2 T. sugar
1/2 t. ground cinnamon
Ice
Club soda
Mint sprigs – for garnish (did not use)

Peel, core and chop one of the apples. In a bowl, combine the Chardonnay, Schnapps, pisco and honey. Add the quartered orange, the lemon, lime, cinnamon sticks, the chopped apple, ginger and cloves and refrigerate at least 4 hours. (I let mine sit overnight)

Strain the sangria into a pitcher. Peel, core and finely chop the remaining apple. Peel, section and chop the remaining orange. Mix the apple and orange in a bowl.

On a small plate, blend the sugar and cinnamon. Moisten the rims of wine glasses and dip in the cinnamon sugar to coat. Fill the glasses with ice. Pour in the sangria until three-quarters full. Top with a splash of club soda. Garnish with a spoonful of the chopped apple and orange and a mint sprig.

Source: Adam Seger & Food and Wine Magazine

IMG_2096 (Medium)

Add to: Facebook | Digg | Del.icio.us | Stumbleupon | Reddit | Blinklist | Twitter | Technorati | Yahoo Buzz | Newsvine

November 1, 2009

Homemade Limoncello Part Two & All Through The Year Cheer is Moving!

Ok first up.  Faith and I have decided to start a separate website dedicated to our new event, All Through the Year Cheer.  It’s up and running so everyone go check it out :) We hope that everyone will continue to participate in our event and please feel free to spread the word.  We will be giving away a lot of great prizes this year too.  Also on the site you will learn about our upcoming Thanksgiving event and the time line for your recipe submissions. Ok, without further adieu here is the new site: All Through the Year Cheer.

All Through The Year Cheer Fall

Now onto the limoncello. Back in August I started making limoncello and now it’s finally time to complete step two. I know it seems to take a long time to make this luscious lemon concoction but as the saying goes “good things come to those who wait.” So while yes, you will wait, you will be rewarded with a delicious liquor before Christmas.

In step one of limoncello making we combined the skins of 15 lemons and one full bottle of 190 proof grain alcohol and 80 proof vodka. After letting that sit for over 40 days the oil in the lemon skins has infused with the alcohol and made a very fragrant (not tasty…just yet) lemon alcohol. You know you are ready to move to step two when scoop out a peel and can snap it in half like a potato chip. If the peel is still flexible and can bend with out breaking put the lid back on the jar and try again in another week.

IMG_1788 (Medium)

Lemon peels sitting at the bottom of jar. Notice how yellow the liquor has become.

After you have decided it is time to move on to step two the first thing you will do is make a sugar syrup with 4 1/2 cups sugar and 3 cups distilled water or filtered water. Do not use mineral water. After is has boiled for 5 minutes let is sit and cool to room temperature.

IMG_1780 (Medium)

Pouring the sugar into the distilled water. Time to make a sugar syrup!

As the sugar syrup is cooling it is time to start taking the lemon peels out of the alcohol. Try to be as careful as possibly not to break the peels into a lot of small pieces. This will make it easier and less messy when you filter your liquor.

IMG_1815 (Medium)

Using a pasta server to extract the lemon peels.

IMG_1807 (Medium)

All the extracted peels.

After all or most of the peels have been successfully removed it is time to start filtering the limoncello. To do this you will need another clean glass gallon jar, a large funnel and #4 coffee filters.

IMG_1824 (Medium)

Second jar prepared to filter lemon infusion.

To strain slowly start pouring liquid from the first glass into the filtered funnel that is sitting on top of gallon glass jar two.  Do not fill to high because filters will clog quickly.  This process will take a little bit of time.  Fill funnel about half full, wait for it to be mostly empty and pour more liquid in.  When filters clog simply remove from funnel and replace with new filter.

IMG_1833 (Medium) (2)

Filtering the limoncello.

IMG_1832 (Medium)

Slowly going through filter.

IMG_1826 (Medium)

Watching the liquor filter. It got old very quickly...haha.

Halfway through the filtering process I took pictures  show how much clearer the infusion became.

IMG_1840 (Medium)

Original infusion.

IMG_1841 (Medium)

Filtered infusion.

After the infusion is filtered into the second glass jar it is time to clean and wash the original jar.  After the jar has been cleaned you have to filter the infusion back into the original jar. The process is the same. Use a large funnel and a #4 coffee filters.

IMG_1855 (Medium)

Ready to filter the infusion back into the original glass.

After the infusion has been transferred back to the original glass it is time to incorporate the cooled sugar syrup.

IMG_1857 (Medium)

Pouring the sugar syrup into the lemon infusion.

IMG_1860 (Medium)

The sugar syrup has been fully added and just needs to be stirred. I love the bright yellow color!

After the sugar syrup has been added it is time to stir the infusion and tightly put on the lid.  Return to a cool dry place for another 40 days to start the mellowing out process that combines the alcohol infusion with the sugar syrup to create Limoncello.

Stirred limoncello. Hopefully it will taste great after 40 days!

Ok ladies and gentleman this is step two of the Limoncello process.  In 40 or so days I will share the final step. Bottling.  If you are interested in making your own limoncello please refer to my first post located here so you can get started correctly.  Although I will include the complete set of instructions for Part One and Part Two of Limoncello making. My first post was helpful because it gives great step by step (and pictures!) of the process.

Limoncello:

Step One: (You can find the step by step write up here.)

Ingredients and tools for step one:

1 750ml. bottle of vodka 80 proof

1 750ml. bottle of grain alcohol 190 proof

15 large thick skinned bright yellow lemons

A very clean dry gallon glass jar with tight fitting lid

Day 1:
Pour the bottle of Everclear and the bottle of vodka into the gallon jar.

Try to use organic lemons or make sure that lemons are cleaned to remove all pesticides, dirt, and fertilizer chemicals. Dry the lemons.

Use a potato peeler to peel just the yellow part of the skin off the lemons. Make sure you have NO white pith on the back of the peels, because this causes bitterness in the finished liqueur. Try to make the peel pieces as large as possible, because this will make the straining process easier.

Put the lemon peels in the gallon jar and stir gently.

Cover tightly and put away in a cool (not cold) dark place for alcohol to extract oils from peels, creating an infusion.

Days 8, 22, & 36:
Gently stir lemon peels to refresh exposure to alcohol. Return to cool, dark place.

Day 43:
Gently stir lemon peels.

Scoop out one of the larger peels and test flexibility. If peel breaks like a potato chip, you will move on to the next step. If peel is still flexible enough to bend without breaking, return to cool dark place and try again in another week.

Step Two:

Ingredients and tools for step two:

A very clean and dry gallon glass jar or pitcher

Large supply of unbleached #4 cone coffee filter (I could only find white cone coffee filters, not sure if they were bleached or not)

Large funnel

Slotted spoon or pasta server

4 1/2 C. white sugar

3 C. Distilled or filtered water (I used distilled)

Day One:

Dissolve sugar in water and bring to boil over high heat. Boil for 5 minutes.

Set syrup aside to cool. It must be room temp before adding to infusion.

Use a slotted spoon or pasta server gently scoop lemon peels from the infusion and discard. Try to avoid creating small pieces that will make straining more difficult, try not to break peels as you remove them.

Using the larger funnel and #4 coffee filters, slowly strain infusion through filters into large pitcher. This is a messy process. The filters will clog quickly and you will use many of them.

Rinse and dry gallon jar.

Repeat straining process, transferring infusion from pitcher to original gallon jar by straining again through #4 coffee filters.

Return filtered infusion to jar and add COOLED syrup.

Return to cool dry place for 40 days to begin mellowing process that combines alcohol infusion with syrup to create Limoncello.

Source:Slow Travel Italy

Add to: Facebook | Digg | Del.icio.us | Stumbleupon | Reddit | Blinklist | Twitter | Technorati | Yahoo Buzz | Newsvine